I have moved all my blogs to my new website: https://helpfulofficetips.wordpress.com/2015/06/12/powerpoint-photo-album-shortcut/From now on, all updates will be at the new site, and all links will take you
directly to that site. Please check it out!
An office was putting on a spur of the moment open house and wanted the computer screens to show photos from the previous year. By spur of the moment, I mean 15 minutes from now. A problem? Not with PowerPoint’s built-in Photo Album shortcut.
To prep, get all your photos in one folder – I don’t think
there is a limit. The office I mentioned
had over one hundred. Also, pick some
music if you have any mp3 files handy.
That’s all you need. Oh, and a
PC. This shortcut is not available on
Macintosh.
Open PowerPoint and save your document as Year in Review
Photos or other appropriate name.
On the Insert tab>Images section>click on the Photo
Album dropdown arrow. Then select New
Photo Album.

The Photo Album window will appear.

·
Dragging through them all
·
Ctrl-click each one
·
Click on the first one. Hold down Shift and click on the last
one. This will select the entire range.
·
Ctrl-A to select all.
Now click Insert and PowerPoint will place the photos in
the Pictures in Album section. You may click
on the photo you want to change and use the buttons to change the order, the
orientation, the brightness or contrast.
Your photos are set, so In the Album Layout section,
select how many photos per page. If you
want one photo per page and for the photo to fill up the page, select Fit to
slide. Frame shape is another option,
although I usually use the default Rectangle.
In the Theme box, click browse and pick any theme. You can change this easily later, so just
pick the first one that catches your eye.
Now click Create and PowerPoint does all the tedious work
for you. You may need to add some text
to the first slide. Also, if you don’t
like the Design, go to the Design tab and pick one you do like.

Every slide show needs a
transition from slide to slide, so pick one. I usually use “Fade” because it is
professional and doesn’t draw attention to itself. Depending on your slides, you may want to
take this opportunity to use one of the obnoxious, er, I mean Dynamic Content transitions
like Orbit. To get to the unusual transitions,
click the down arrow in the Transition to This Slide section.
We will not be sitting at the computer for this show, so we
want the slides to advance automatically.
From the Transitions tab>Timing section, enter 5 seconds in the After
box. (Leave the On Mouse Click button
checked in case you want to advance the slides before the automatic timing.)
 The secret weapon in the Transitions tab is the Apply to
All button. Apply to All - ALWAYS DO THIS LAST AND ALWAYS DO IT AFTER
MAKING ANY CHANGES! This applies your
transition and timing to every slide.
Remember, you want people to look at your slides not your PowerPoint
transitions. Uniformity is good in this
case.
The secret weapon in the Transitions tab is the Apply to
All button. Apply to All - ALWAYS DO THIS LAST AND ALWAYS DO IT AFTER
MAKING ANY CHANGES! This applies your
transition and timing to every slide.
Remember, you want people to look at your slides not your PowerPoint
transitions. Uniformity is good in this
case.
Your Slide Show is complete now if you do not want to add
any music. Click on Slide Show
tab>From Beginning to see your masterpiece!
Is it a little
bland without background music? One more
simple step will fix that.
 Go to the first slide.
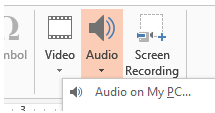
From the Insert tab>Media section, click on the arrow below Audio. Select Audio on my PC. Pick a song that sets the appropriate mood. Remember, earlier you saved your music in the same folder
as your presentation. Click insert and a
speaker icon will appear on your slide and it should be selected (if not,
select it).
Go to the first slide.
From the Insert tab>Media section, click on the arrow below Audio. Select Audio on my PC. Pick a song that sets the appropriate mood. Remember, earlier you saved your music in the same folder
as your presentation. Click insert and a
speaker icon will appear on your slide and it should be selected (if not,
select it).
The Audio Tools
tab will appear with the Playback tab. In the Audio Styles section select Play in
Background. This will automatically
change the settings to:
· Start
automatically with the current slide
·
Play Across Slides
· Loop until Stopped
· Hide the icon during the slide show

Review your Slide Show again
by clicking Slide Show tab>Start Slide Show section>From Beginning. You can always end the show with a right
click.

Once you have done this a few times, you should be able
to create a one hundred photo show in about five minutes.
Oh, and the office I mentioned, visitors loved the show
and thought we spent hours on it.
The blog was absolutely fantastic! Lot of information is helpful in some or the other way. Keep updating the blog, looking forward for more content...Great job, keep it up.
ReplyDeletePrint Malaysia